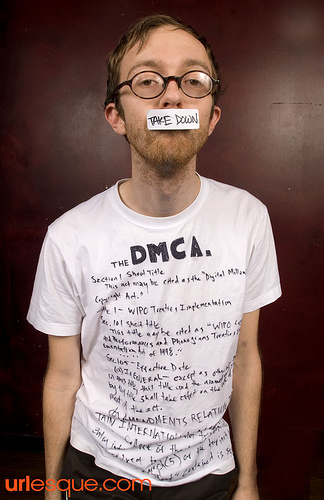
| This guide, originally created by the Fair Use Network, has been edited by New Media Rights, and is provided for users and creators who have received a DMCA section 512 "takedown" notice. |
Step 4. Assessing the options and taking action.
The possible responses to a takedown notice are limited. Most ISPs will "expeditiously" take down the targeted material. The person whose material is taken down can choose to let it go (that is, to acquiesce); to try to get it restored; to try to resolve the dispute through compromise; and/or to take a proactive approach through media attention or a lawsuit.
Although acquiescence comes first in this list, that does not suggest that that acquiescence is the best solution in any particular situation. Rather, takedown notice targets should understand their own rights, and respond accordingly. Fair use and other free expression safeguards in IP law can atrophy if they are not understood and used.
It may be worthwhile to consult an attorney.
Below we discuss what a recipient, or her attorney, might do in response to a section 512 takedown.
Acquiesce / let it go. Someone whose material has been targeted may decide to just let it go, either because he concludes that his material may in fact infringe the sender's copyright, or because he feels it's not worth the effort to fight it. Acquiescence may not be the end of the matter, though. While getting information successfully removed from the Internet, or de-indexed, might mollify the rights holder, she may still decide to sue for damages or harm she feels has already occurred.
File a counternotice. If the use is justified, it is a fairly simple matter to file a counternotice. Reviewing sample counternotices can provide guidance, as can Chilling Effects' counternotice generator. Filing a counternotice makes it no more or less likely that the user will win if the dispute ends up in court.
Counternotice Samples
Cease & Desist 101 for claims other than DMCA § 512 takedown notices
Try to resolve the dispute. The person targeted by a takedown notice can try to resolve the dispute, often by proposing some sort of compromise. He could offer to edit the work to take out some of the challenged content, to give credit for the original work, or to pay a licensing fee to use it. He doesn't need to agree that his conduct was infringing in order to make such an offer. Many, perhaps most, courts would look at such compromises as good faith attempts to avoid litigation, not as admissions that the original conduct was infringing. It may be helpful, however, to consult with an attorney to avoid any appearance of admitting to wrongdoing.
Take the initiative. People targeted by cease and desist senders may also take a proactive approach. The DMCA itself includes a section, DMCA § 512(f), for users to file suit if the takedown notice made a "material misrepresentation" that material was infringing.
If the sender has threatened to sue, then the target can file a "declaratory judgment" lawsuit asking a judge to rule that the use is fair and lawful. If the sender has a bad motive for sending her notice, such as trying to stifle politically important speech, some states provide "anti-SLAPP" procedures that may be applicable. If a sender's claims are harassing or abusive, the target may be able to seek an injunction or damages for harassment, abuse of legal process, or intentional or negligent harm. Or a lawsuit may simply be a way to resolve a genuine legal dispute, with IP or other claims on both sides.
Find More Help. Anyone who receives a DMCA § 512 notice may wish to talk with an attorney who has expertise in the area of electronic civil liberties, or the particular subject. Targets of takedown notices who feel they have a strong or sympathetic case may wish to contact the media and civil liberties organizations to draw attention to the situation, or gain legal representation in the case.
Directory of legal assistance organizations[link]
Document the process. Keeping good records is an invaluable part of any legal process, including section 512 takedown interactions. The target of a takedown notice should document everything that has happened. This includes listing how and when he began developing his work; when he posted it or made it available to others; how he distributed it; how much it cost and whether or not any profits have been made from it. He should also keep copies of any relevant correspondence. Having this material in advance will also help attorneys assess the matter more quickly. Be aware that if the matter ends up in court, such records may be subject to "discovery" by the other side.
Some people choose to publicize cease and desist letters and takedown notices on their websites. They may do this as part of a media strategy, to draw attention to what they see as a wrongful or abusive claim, or just to explain why they have taken the information down. Some senders may try to dissuade recipients from publicizing the action, by claiming that the letter is confidential, privileged, or protected by copyright. However, Chilling Effects has posted thousands of such letters and notices, as have many online activists who thought it was in the public interest to alert others to the types of claims made by some IP owners.
Submit notice to the Chilling Effects Clearinghouse. We encourage everyone to submit their notices to the Chilling Effects Clearinghouse. Chilling Effects collects cease and desist letters for two major purposes. First, publishing and annotating the notices for public viewing enables other recipients and targets to compare and learn about the law and the ways it is applied. Private information is generally redacted, and notice recipients can edit out any other private or identifying information before submitting it to Chilling Effects. Submission to the Chilling Effects Clearinghouse will also help users identify repeat senders.
Second, since cease and desist letters are sent by private mail and not usually publicly filed in a court, there is no way to know for sure whether their use is increasing or decreasing, what they are being sent for, or if the process is being abused. By contributing this legal correspondence to a clearinghouse, attorneys and researchers can look at the senders, targets, and types of claims made, to get a better sense of whether the law is working, or whether it's dysfunctional. Contributing to Chilling Effects may help reform bad laws, or prevent abuses in the future.
Submit your notice to Chilling Effects or to New Media Rights to have it published